
How to set java_home on Windows 10?
This tutorial shows you how to set a JAVA_HOME system variable on Windows 10.
Tested
- Windows 10
- JDK 1.8
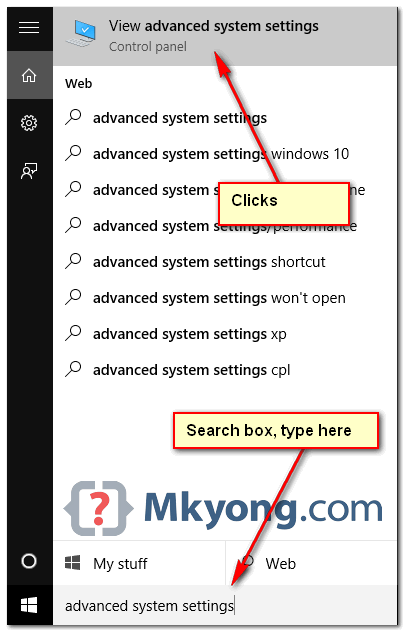
1. Advanced System Settings
Type advanced system settings in the search box (beside the Windows start button), clicks View advanced system settings.
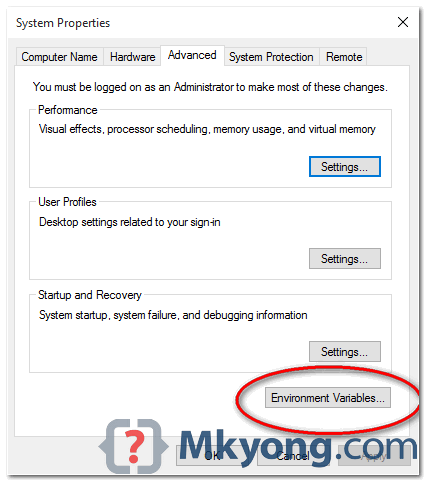
2. Environment Variables
Select Advance tab, clicks Environment Variables
3. Add JAVA_HOME
In System variables, add a new JAVA_HOME variable and point it to the JDK installed folder.
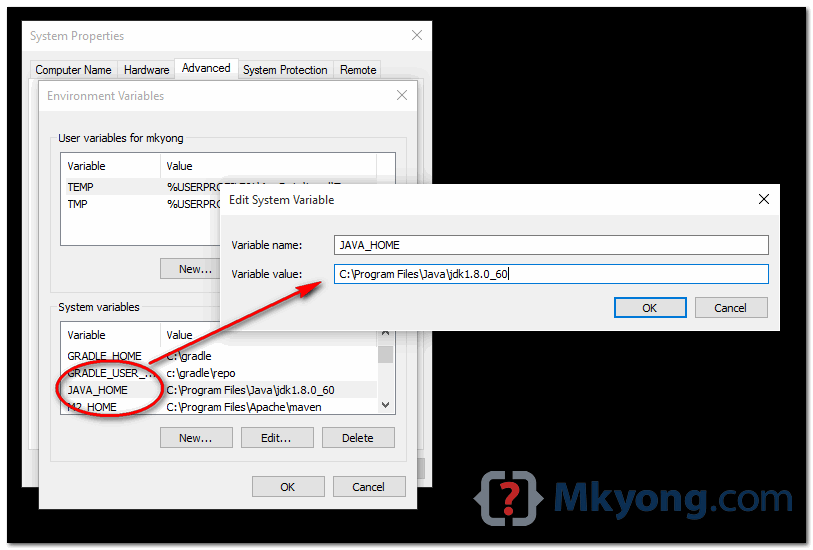
Note
Don’t include the
Don’t include the
\bin folder, just the JDK path. For example
- Correct – C:\Program Files\Java\jdk1.8.0_60
- Wrong – C:\Program Files\Java\jdk1.8.0_60\bin
4. Update PATH
In System variables, find PATH, clicks edit and append this %JAVA_HOME%\bin to the end.
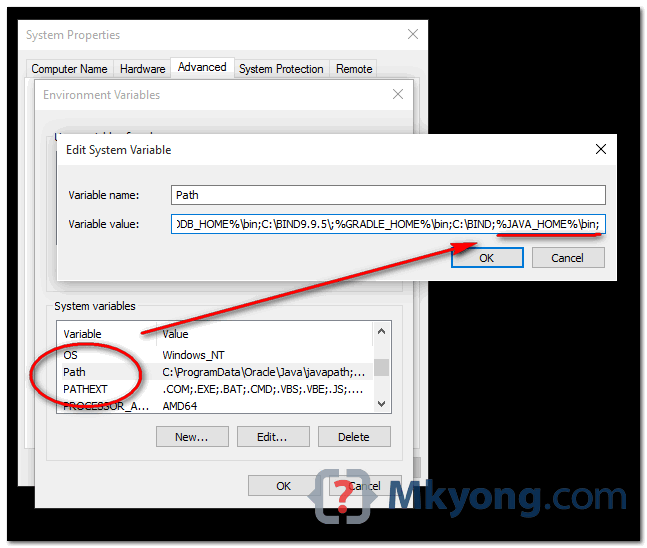
P.S Puts the JAVA_HOME\bin in PATH make the Java’s commands are accessible from everywhere.
Done.
5. Test
Open a command prompt, type :
Bash
C:\Users\mkyong>java -version
java version "1.8.0_60"
Java(TM) SE Runtime Environment (build 1.8.0_60-b27)
Java HotSpot(TM) 64-Bit Server VM (build 25.60-b23, mixed mode)

C:\Users\mkyong>javac -version
javac 1.8.0_60

C:\Users\mkyong>echo %JAVA_HOME%
C:\Program Files\Java\jdk1.8.0_60