
Google Client API with PHP – step by step tutorial with (some) screenshots | enarion.net
Google Client API with PHP – step by step tutorial with (some) screenshots
This page describes how you can access Google data with some handy PHP code, using the official Google Client API for PHP and OAuth2. To make it short, this is not a dirty hack but provides the official way of doing this. Unfortunately the samples provided in the client library by Google might not suite you very well. This script is the foundation for the other Google client API tutorials.
Info: in case you use composer to manage your dependencies, have a look at google/apiclient at github.
Goal
Create and setup up an Google API console project and finally connect with a simple PHP script.
Step 1: Setup the Google API project
- Go the the Google API console.
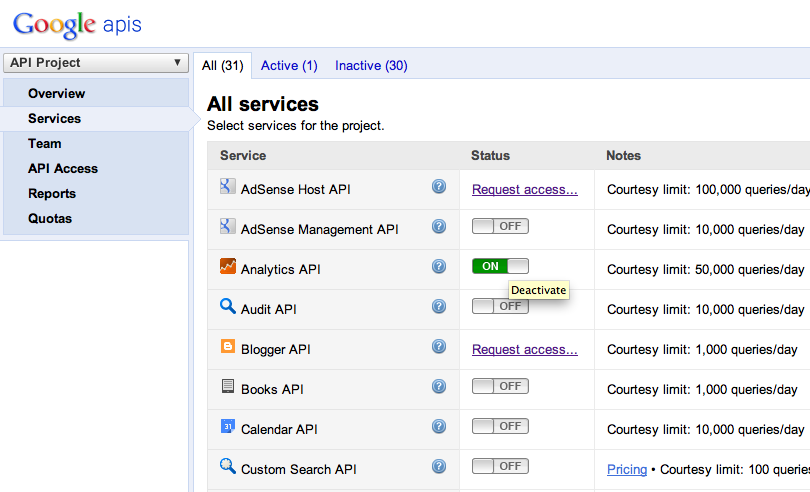
- Select Services and check Analytics API:
- Select API Access. You should see something like the following:
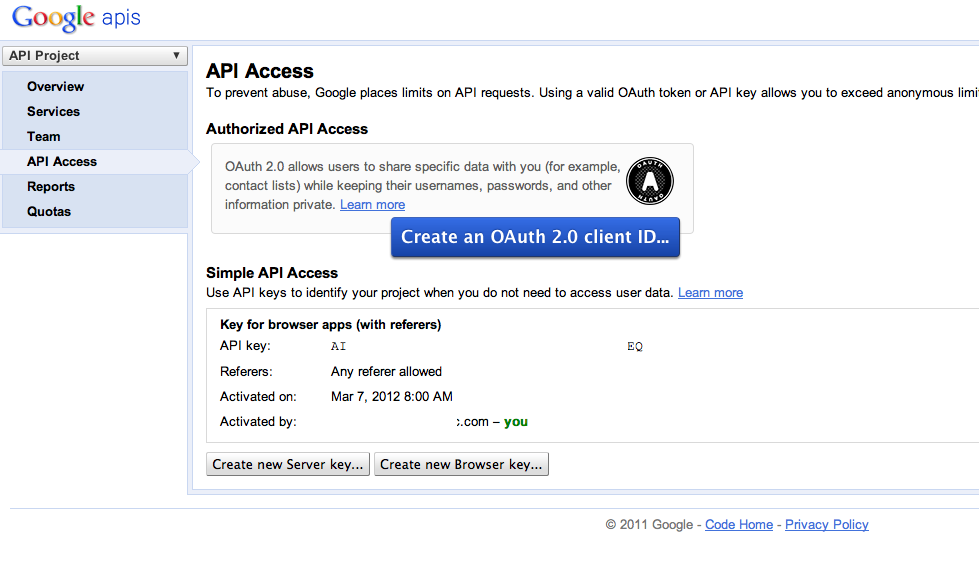
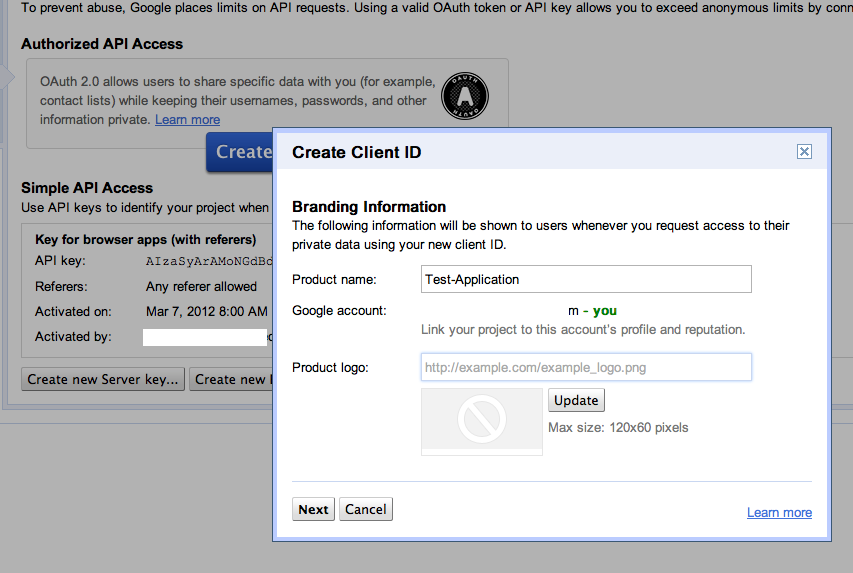
- Click on “Create an OAuth 2.0 client ID”. Write something into Product name. Check the value for Google account – this should be your (correct) Google account.
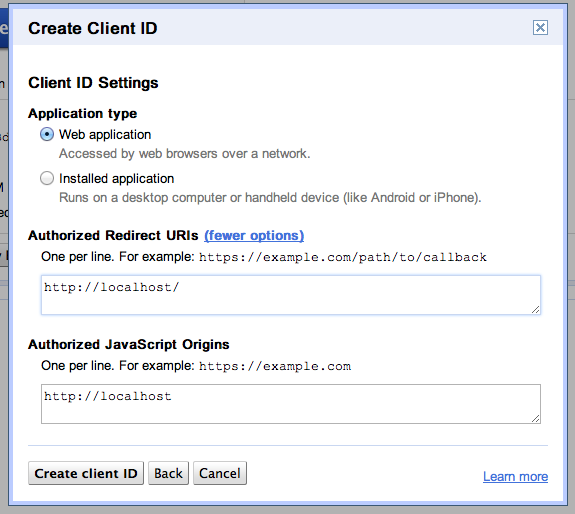
- Click on Next. Now you select “Web application” (since PHP is mostly used for web applications and this tutorial is no exception). Use localhost if you would like to try it out, otherwise you can also use a domain.
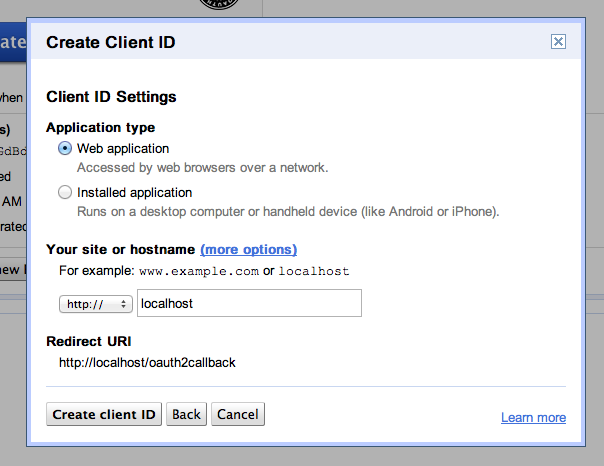
- Click on (more options) and change the value for Authorized Redirect URIs as in the following screenshot (remove oauth2callback). You can change this list later if more than one url are required. Finally click on “Create client ID”.
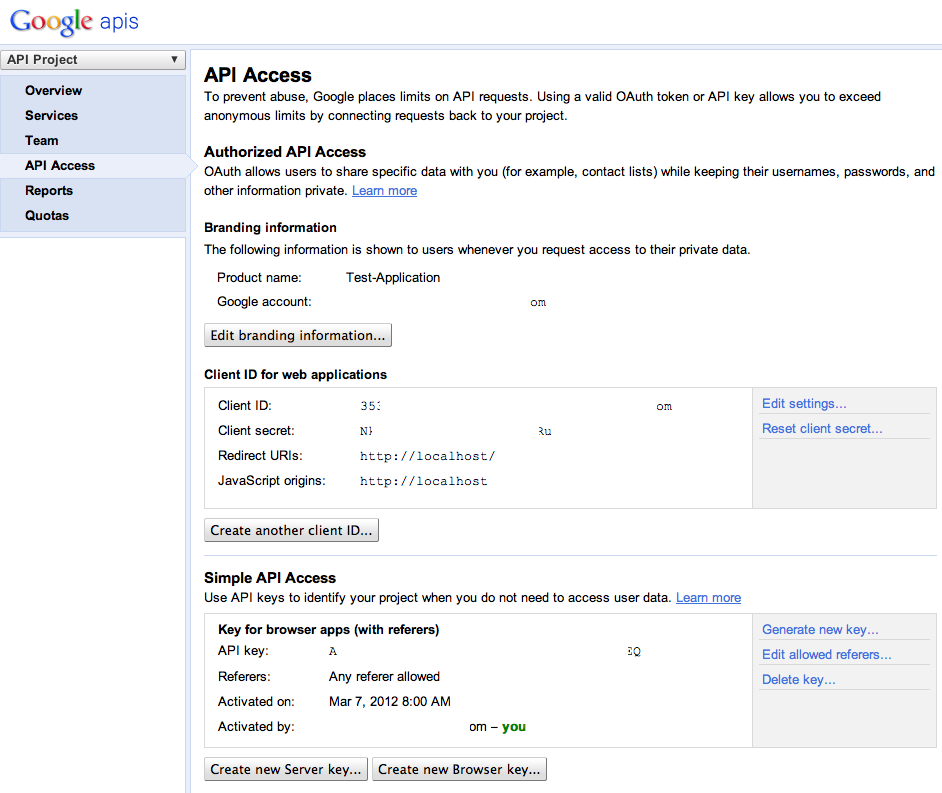
- Now your account is created. You should see something like this:
Step 2: calling Google
- Download the latest release of the Google Client API PHP library and store it on your webserver. Rename it to GoogleClientApi.
- Create an empty file (e.g. googleapitest.php) and store it on your webserver. We assume that it is available on the url www.yourdomain.com/googleapitest.php . You can use every name and url you like, just adapt the path in the following steps accordingly.
- Check that the url of the test script (www.yourdomain.com/googleapitest.php) is in the list of Redirect URIs in your Google API console. (see number 6 and 7 in step 1)
- Copy the following code into the test script:
<?php
session_start();
require_once dirname(__FILE__).'/GoogleClientApi/Google_Client.php';
require_once dirname(__FILE__).'/GoogleClientApi/contrib/Google_AnalyticsService.php';

$scriptUri = "http://".$_SERVER["HTTP_HOST"].$_SERVER['PHP_SELF'];

$client = new Google_Client();
$client->setAccessType('online'); // default: offline
$client->setApplicationName('My Application name');
$client->setClientId('INSERT HERE');
$client->setClientSecret('INSERT HERE');
$client->setRedirectUri($scriptUri);
$client->setDeveloperKey('INSERT HERE'); // API key

// $service implements the client interface, has to be set before auth call
$service = new Google_AnalyticsService($client);

if (isset($_GET['logout'])) { // logout: destroy token
    unset($_SESSION['token']);
	die('Logged out.');
}

if (isset($_GET['code'])) { // we received the positive auth callback, get the token and store it in session
    $client->authenticate();
    $_SESSION['token'] = $client->getAccessToken();
}

if (isset($_SESSION['token'])) { // extract token from session and configure client
    $token = $_SESSION['token'];
    $client->setAccessToken($token);
}

if (!$client->getAccessToken()) { // auth call to google
    $authUrl = $client->createAuthUrl();
    header("Location: ".$authUrl);
    die;
}
echo 'Hello, world.';
step 3: try it
Now start the test script in your browser, e.g. www.yourdomain.com/googleapitest.php.
You will be redirected to Google for the authentification of the access of your web app to your Google profile data. If you are already logged in with a Google profile, the following screen will appear:

(You will see the message and buttons in the language of your browser)
Press acknowledge (left button) and you will be redirected to your test script. Since no functionality is implemented, you will only see “Hello, world”.
Now you can continue with the next article Accessing Google Analytics with Google Client API and PHP.
Further reading
